In this article you will find information about:
2. Setting up ‘New’ connections
3. To import from an ‘Existing’ connection
1. Prerequisites:
What you need to have?
- One must have Visma.Net’s credentials / username/ password handy.
2. Setting up ‘New’ connections
Step 1:
In ‘Organisatie’=> select ‘Connection’=> click on ‘New’ connection.
Step 2:
Select Visma from the new connections
Step 3:
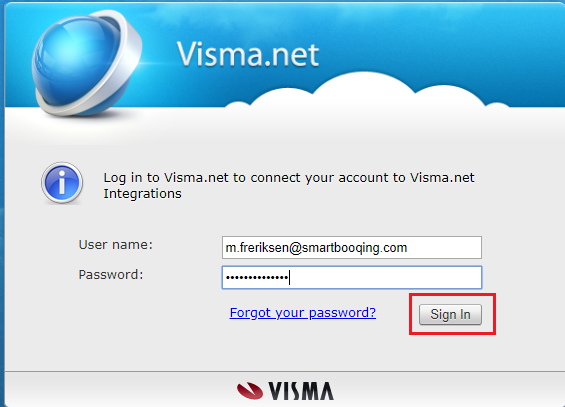
Enter Visma credentials- username and password
Step 4:
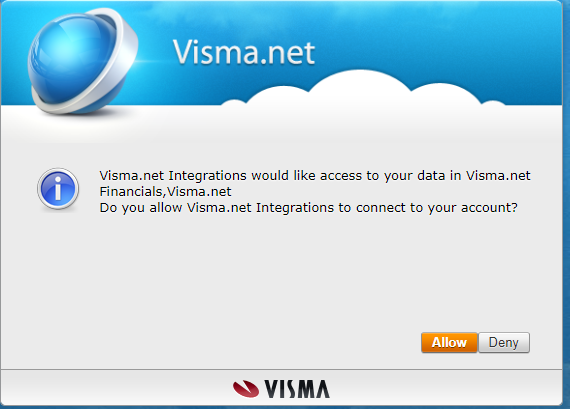
Click on ‘allow’
Step 5:
A list of administrations will be available, select the administration by clicking on the checkbox and click on ‘next’
Step 6:
- On click of next you will be able to see the below screen and you are required to enter the COC number or sector.
- If you don’t have the COC then you are required to give the reason for not having the COC (you can select ‘Not a company or test/Demo) and select Sector.
Step 7:
- Next screen is bulk assignment where you can assign your administrations to Users, Templates, or Divisions.
- Steps:
- Select administrations (By default all are selected)
- Assign Division
- Assign users:
- By default, all the newly added administrations are assigned to all ‘Administrators’.
- Assign template
- This step is not mandatory, can be skipped or else click on finish.
- Once done; you will be notified with below image.
Once the administration are imported you can check the status of the imported administration. Wait for few minutes the status of the administration will change from ‘configuring’ to ‘active’.
3. To import from an existing connection:
- Go to connections and select Visma
- Click on import administration and enter the Visma credentials
- Follow steps 4 to 9


